

Everything you need to know about how to cook the perfect turkey from start to finish. With instructions on how to make your turkey paleo, dairy-free, and gluten-free! This guide is great for everyone from beginners to pros!
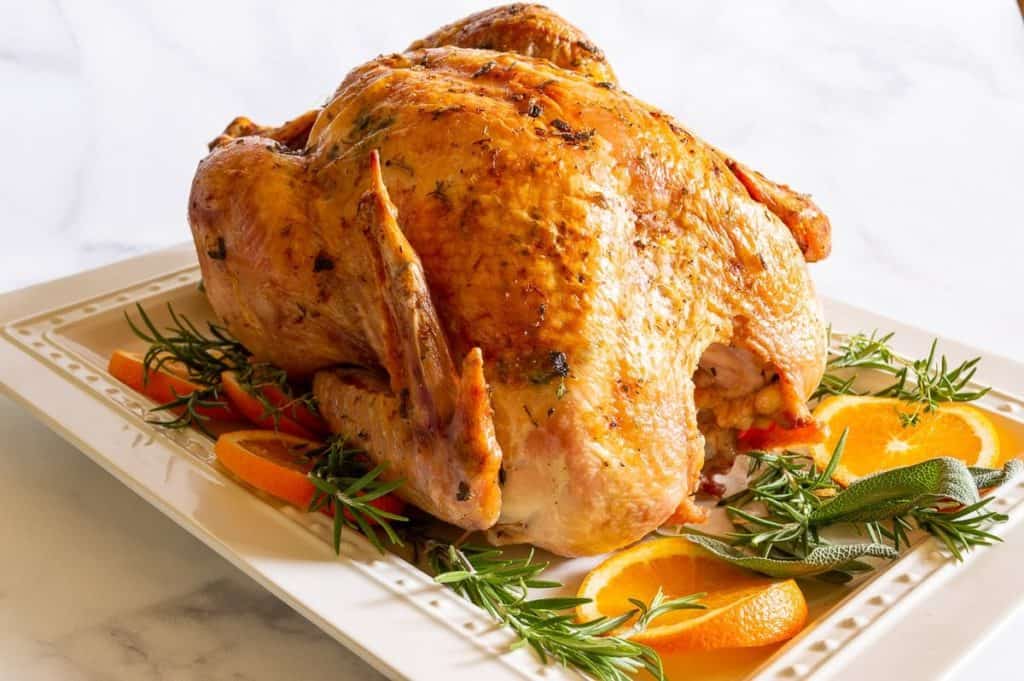
Making your first turkey can be intimidating. Making your second or third or fourth can be pretty intimidating too! Cooking the perfect turkey on Thanksgiving takes a little bit of planning, good timing, and most of all a lot of salt. Follow along as I walk you through all of the steps to from start to finish.
This recipe is also designed to be dairy free and gluten free making it perfect for those on paleo or Whole30 diets or those that have food sensitivities.
How to brine a turkey:
Brining a turkey is an essential step that you should be doing if you don’t want to have a big dried out hunk of bird. It helps keep the meat tender and juicy and ensures that it is all well seasoned. Be sure to use a bird that hasn’t been pre-brined or injected with a salt solution. If this is the case you do not need to brine it or it will turn out very salty.
What is a dry brine?
A dry brine is the process of brining the turkey without submerging it in water. This is a great method for when you don’t have enough space to fit a whole turkey in a bucket of water. To dry brine start with a fully thawed turkey, prepare your brining mix (mine is usually just salt and pepper) and slather it all over the turkey. Make sure that you really cover the breasts well as that is the thickest part of the meat.
Then simply place the turkey uncovered in a pan in the fridge for at least 24 hours but preferably 48 hours. This will allow the skin to get ultra crispy as the salt works it’s way through the meat. Don’t worry about the amount of salt used for the brine as the end product will not be salty.
What is a wet brine?
A wet brine is submerging the turkey in a bath of cold water, salt, and sometimes other spices and sugar for several days. This can be done in a bucket, a cooler, or a large bowl if you turkey is small enough. Just like dry brining it is important that the turkey is already mostly thawed and that the giblets and neck are removed.
As the turkey soaks the salt gets absorbed into the meat, this helps it stay moisture, tender, and flavorful even after it’s been cooked for several hours. This absorbing can only happen over extended periods of time so it is important that the turkey has at least 24 hours but preferably 48 hours. While more time might seem like it will make the turkey even better do not soak it much over 48 hours as the salt will start to break down the proteins in the meat. This will make it a gross texture once cooked. Cooking things well really is a science!
How to cook a turkey:
Over the years I have heard lots of tips and tricks for cooking a turkey. From basting every 15 minutes to cooking in a plastic turkey bag, all the way to getting a ladder and dropping a turkey into a pot of hot oil. Turns out a lot of this advice is mostly bogus and sometimes dangerous. Let’s talk about the most common and efficient ways to cook a turkey.
Cooking a turkey in the oven:
First lets talk about the things you don’t need to cook a turkey in the oven. You don’t need a plastic turkey bag, the plastic pop out thermometer, or a turkey baster. What you do need is a roasting rack, a large pan with sides, a good meat thermometer, and some good oven mitts. Cooking requires patience and that is the most important part of a good turkey.
When cooking the turkey in the oven my end goal is always crispy skin and tender juice meat. To achieve this I start by heating my oven very hot to 450 degrees. Once it is hot I pop my turkey in and let it cook for about 30 to 45 minutes at this temperature. This helps it develop a golden hue to the skin. Once the skin starts to brown I reduce the heat and cook the turkey at 325 for however many hours it needs, depending on the size.
A good rule of thumb is 15 minutes for each pound. For example if you are cooking a 15 pound bird it would be 15 lbs x 15 minutes = 225 minutes/3 hours 45 minutes. Don’t forget to factor in resting time. The turkey needs about 30 – 45 minutes before you carve it to rest and reabsorb the juices. It will still be quite hot after an hour so don’t worry about having to serve it cold.
Be sure to plan plenty of time in your schedule to get it in the oven and done before meal time. This is one of those processes that you just can’t really speed up no matter how much you want to so be sure and hungry guests are not happy ones.
Cooking a turkey on the grill:
The grill can be a perfect place to cook the turkey when you need the oven space or maybe don’t have a big enough oven to fit a big turkey. It takes about the same amount of time as cooking in the oven. Start out by brining your bird and seasoning. Then place it in a disposable roasting pan and cook in a grill heated to approximately 325 – 350 degrees for 15 minutes per 1 pound.
An in oven thermometer can be very useful to keep an eye on the temperature. I use this one and have it sitting on the shelf of the grill. That way I can quickly see if I’m getting close to done or if I still have a ways to go. For more specific instructions on grilling a turkey you can check out this recipe.
Cooking a turkey in a smoker:
A turkey can be smoked using a dedicated smoker or a grill with a smoker box with wood chips. This can be a fantastic way to cook a turkey that will really impress your guests. Basically, low and slow it the name of the game. Smoking a turkey takes about twice as much time as cooking in the oven so really plan out our day or maybe night well if you want to go with this method.
You will still brine and season your turkey, just as you would if you were baking it. It is not recommended to stuff a turkey before smoking it as it will almost impossible to get the stuffing to cook before the turkey is overcooked. If you are interested in more detailed instructions here is a fantastic recipe to get you started on making a smoked turkey.
Cooking a turkey in a deep fryer:
While it is possible to cook a turkey in a deep fryer it requires some crazy equipment to set it up and it is very dangerous. Thanksgiving is stressful enough on its own so I would just skip this method all together. There are better ways to get crispy skin!
Do I need to baste the turkey?
Basting is the cooking method of continually reapplying the cooking liquid to the item you are cooking through out the baking process. The idea is that reapplying the liquid will allow the meat to stay moist and not dry out. It’s a topic that people have a lot of feelings about if it actually helps or not.
I think both sides are sort of right? It doesn’t seem like basting does anything to keep a turkey moist. That all comes down to the brining you do before hand. But basting it with a sauce, glaze, butter/ghee can help it develop that crispy, golden skin you want your turkey to turn out with. I recommend reapplying any glaze or sauce 2 or 3 times during the cooking process. Be sure to open and close the oven quickly so you don’t lose as much heat.
What to do with turkey giblets:
Giblets are the gross parts of the turkey that you pull out of the cavity before you prepare it to brine or season. It includes things like the neck and some of the internal organs. A lot of people throw these bits away because they look gross and they don’t know what to do with them. But I am a big believer in not wasting anything! There are two main uses for the giblets. You can use them to make a gravy or save them to make a turkey stock to use in future recipes.
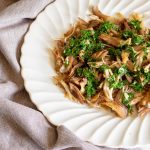
Turkey Giblet Gravy
Gravy is an essential part of the Thanksgiving spread and giblets help give it that extra oomf to really make your gravy stand out. A lot of recipes for giblet gravy require using the drippings from the turkey and honestly I don’t have time for that. I want to have my gravy done and ready to be heated so I can’t wait until the 11th hour for the their to be turkey drippings that I’m going to burn myself with.
Giblet gravy basically requires you to use the neck and giblet to make a simple turkey stock to use in the gravy. If desired you can chop up the giblets and add them back in for some texture. Just don’t tell your guests if they are picky eaters.
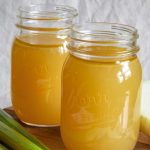
Turkey Giblet Stock
If you want to use the giblets to make a stock after removing them from the turkey place them in a ziploc freezer bag and pop them in the freezer until you are ready to use them. Then when you are ready use the giblets just as you would any of the chicken bones or pieces in my chicken stock recipe. It’s so easy there is no reason not to do it!
How to carve a turkey:
Carving a turkey has never worked out for me quite as simply in real life as it seems to in the movies. By the end of the meal most of my family is just picking off the meat with their fingers. Turns out a lot of my problem was that just going at a turkey with a knife wasn’t enough. Where you cut will make a different in how easy it is to remove the wings and legs and all that is in between.
Basically what you will need is a carving knife, a large cutting board, and a lot of elbow grease. After letting the turkey rest for at least 45 minutes (don’t worry it will still be very hot inside) it is ready to be carved. Start by removing the legs by slicing through the skin and pressing down the thigh until you can see the joint. Using your knife cut through the joint to remove the leg quarter from the turkey. Do this on both sides.
After you have removed the leg quarters use the same process to remove the wings. Then run your knife along the top of the breast just to the side of the breast bone down along the rib cage. You don’t want to cut through bone at this point. The breast should separate in a big piece and you can slice it into smaller pieces from there.
But it’s hard to explain how to carve a turkey with words so if you still feel completely lost watch this quick video to give you a better idea of what I mean.
How to cook the perfect turkey:
Now that you have gotten through all of the explanation on how and why you are doing the different techniques it is time to apply all of it to making the perfect turkey! This recipe was designed to be Whole30/Paleo friendly which means it is dairy free and gluten free. If you do not follow either of those diets it will certainly still work and taste delicious for you.
Perfect Turkey | Paleo, Whole30
Everything you need to know about how to cook the perfect turkey from start to finish. With instructions on how to make your turkey paleo, dairy-free, and gluten-free! This guide is great for everyone from beginners to pros!
Ingredients
- 12 Lbs Turkey Defrosted
- 1/4 Cup Morton Kosher Salt 1/2 Cup if using Diamond Crystal
- 1/4 Cup Ghee Sub: Butter
- 2 Tbsp Black Pepper
- 1 Tsp Fresh Thyme Roughly chopped
- 1 Tsp Fresh Rosemary Roughly chopped
- 1 Tsp Sage Roughly chopped
- 1 Tbsp Orange Zest Fresh
Instructions
Preparing the Turkey
-
Make sure the turkey is completely thawed before beginning. Remove the giblets and neck and reserve for later to make gravy or stock. Pat the whole turkey dry with paper towels.
-
Place the turkey in a roasting pan on a rack or on a sheet pan with a wire rack. Be sure that whatever you use will fit into your fridge. The goal is to keep the turkey lifted off of the pan so that it won't soak in any liquid that comes off of it.
-
Using clean hands rub the turkey with the salt all over. Be sure to get it in all of the crevices. Some of the salt will fall off during this process and that's fine.
-
Once it is salted allow the turkey to chill uncovered in the fridge for at least 12 hours and up to 2 days.
-
On the day you plan to roast the turkey remove it from the fridge and drain any liquid from the pan. Gently knock off any excess salt still hanging on to the skin. Let the turkey come up in temperature by sitting it on the counter in a safe place at room temperature for at least an hour. Don't worry about it getting too warm. It will be going into a very hot oven soon and it should still be quite cold.
Roasting the Turkey
-
Preheat the oven to 450 degrees. Place the ghee/butter in a small bowl with the fresh thyme, rosemary, sage, and orange zest. Mix until well incorporated. Then using your hands or a spatula rub half of the mixture over the outside of the turkey over all of the skin. Gently separate the skin from the meat and spread the remaining half of the mixture underneath the skin. Use your fingers or a spatula to push it all around. It is okay if it is not even as it will all melt once it hits the hot oven.
-
Add 1/2 inch of water in the pan the turkey is resting under. Do not let the water touch the turkey so use less if that is an issue. This will help prevent the drippings from burning.
-
Place the turkey in the preheated oven for 30 minutes. This will help it develop that beautiful golden skin and crispy texture.
-
After the turkey has cooked for 30 minutes turn the oven down to 325 degrees.
-
At the halfway mark (about 1.5 hours for a 12 lbs turkey) check on the turkey to make sure it is not burning. If you notice that the wing tips or beginning to burn cover them with foil loosely for the remainder of the cooking process.
-
Let the turkey continue to cook until it has reached an internal temperature of 160 degrees or the juices run clear when punctured. Measure the temperature in multiple places and make sure the thermometer does not touch the bone as it will not give you an accurate reading.
-
Once the turkey has finished cooking let it rest for at least 45 minutes before carving. Don't worry it will still be plenty hot.
-
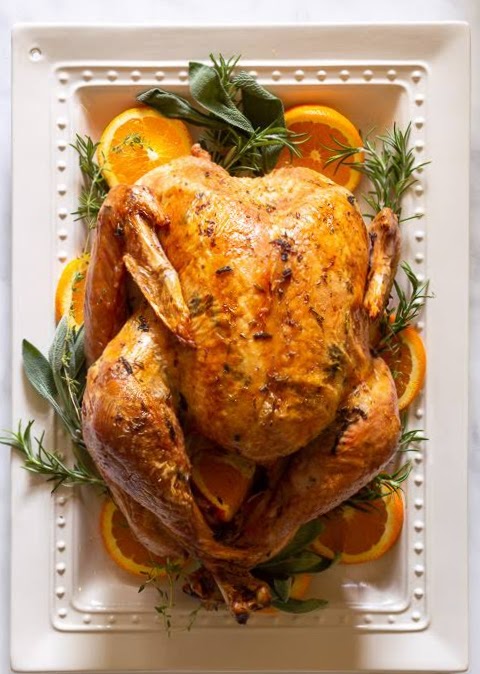
After it has rested remove to a cutting board or platter and serve hot!
Recipe Notes
- Substitutions: If you do not have allergies or dietary restrictions feel free to use butter in the place of ghee.
- If you do not have a pan with a roasting rack or a large enough sheet pan with a wire rack, foil coils can be used in a pinch. Squish the foil into a long strand and wrap into a coil/circle shape and place in the bottom of the pan to keep the turkey lifted up. This will increase air flow and help achieve a more even cooking.
- I would highly recommend and in oven meat thermometer or at the very least a meat thermometer to ensure that your turkey is fully cooked!

Leave a Reply